
I have had a project in mind for a while for a remote sensor (in the sea!) but did not like the idea of having to pay for a 3G/4G connection for it (or pay anything actually!).
I came across LoRa somewhere and saw it stood for Long Range & I was sold – I live 300m from the sea.
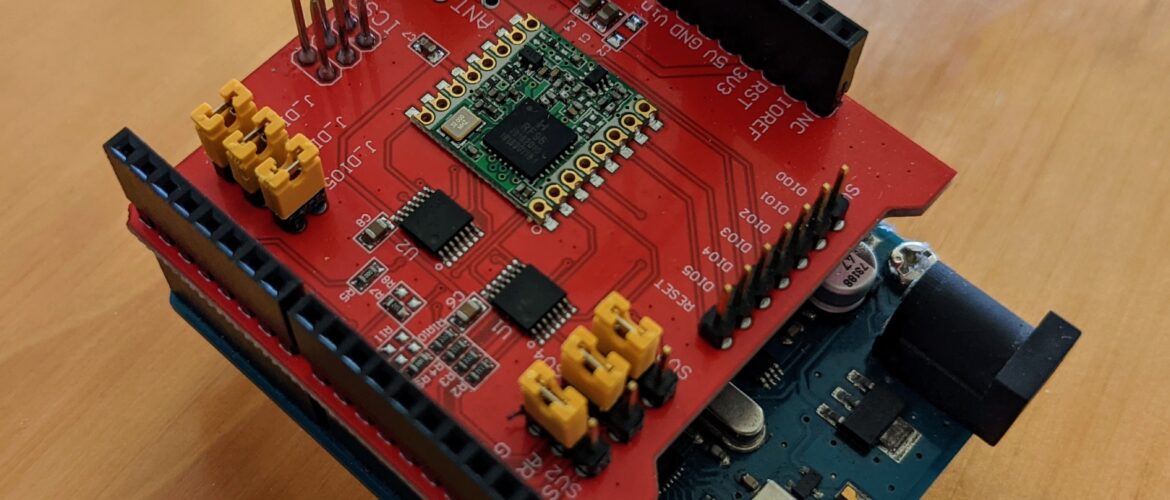
Rather than research further (🥱) I just bought an XC4394 LoRa & Wi-Fi IoT Gateway and an XC4392 LoRa Arduino Shield from JayCar* online as a COVID-lockdown purchase:
- The XC4394 I figured I could get create the bridge between LoRa and the internet (via my home network) and;
- The XC4392 + an Arduino Uno could be the ‘end node’ with sensors (water depth, temp and current velocity in my case).
* FYI JayCar is the Australia/ NZ equivalent of RadioShack (US), Tandy (UK) and the kind of physical shop that sells nerd electronics elsewhere.
In favourable conditions, LoRa can transmit 10+km (up to 20km) according to Semtech. LoRa is actually a trademark of Semtech (who make the chips) and much of the LoRA/ LoRaWAN ecosystem is proprietary. Good link here (from Semtech) and here (by Link Labs) on what-is-what in LoRa-world. You need to put your thinking hat on to understand them though.
Bad(ish) news
The XC4394 and XC4392 have very poor documentation (via the Jaycar website) and the documentation that is provided is woefully undercooked. My advice – scrap JayCar/Duinotech docs and read on here! This is not the first time I have bought something from JayCar and had to start from scratch getting it to work.
An important first point is that the XC4394 ‘gateway’ does not have a modern enough LoRa IC to be a currently compliant LoRaWAN Gateway. I spent a fair bit of time trying to make it do this. It won’t!
This is okay though – setting up your own LoRaWAN Gateway only seems to be relevant unless:
- you want to set up your own extended LoRaWAN (compliant) network… so multiple gateways acting as a single network.
- want to add to the reach of the The Things Network (or some other) community LoRaWAN network.
Maybe you could connect the XC4292 shield to TTN’s Community LoRaWAN network. I am not sure. Near where I live there are 3 community gateways but they are quite a way away, controlled by I-do-not-know-who. So, I am not going to bother trying to connect to them. Here is the TNN community map.

(The jury is still out on the struck-out paragraph below)
There is some other bad news regarding the XC4292 shield. This might be peculiar to where I live though. Local network/phone providers may have a LoRaWAN network – mine does with a free devkit for 5 devices. Excited on getting an email with my account details I tried to connect, failed and then read the small print: the XC4292 I have is on the AS915 channel and the provider uses the AS923 channel. Now, I don’t know if you can change the band setting on the Semtech SX127x chip (the docs seem to suggest you can). For another time perhaps?
Good news 1 – We actually bought (old) Dragino clones
UPDATE 2021/10/28: Changed ‘same as’ to ‘similar’! More on this in a subsequent post.
Both the XC4394 & XC4392 seem to be indirect rip-offs of Dragino products. The XC4394 gateway is similar to the Dragino LG01-S, and the XC4392 shield is similar to the Dragino SX127x shield. So:
- Maybe considered buying ‘legit’ or up to date Dragino stuff, eg, the LIG16 gateway.
but failing that:
- You can use Dragino’s comprehensive documentation for their LG01 & shield.
- You can safely update the firmware on the gateway to the latest (v4.3.7). From memory, the version on my out-of-the-box XC4294 was v4.2. Updating to v4.3.3 will give you some more features plus make Dragino’s docs make sense! Link to 4.3.7 firmware. Easiest way to update is through the WebUI.
Incidentally, the ATMega328P MCU plus Linux combination in the LG01/ XC4394 are actually pretty similar to the now-defunct Arduino Yun.
Good news 2 – There are other options other than LoRaWAN
Putting LoRaWAN on the backburner for the moment, I decided to use MQTT (something I have fiddled with before). The Dragino docs use Thingspeak as the cloud MQTT broker. Thingspeak is MathWorks’s IoT platform – they produce MATLAB. At some point, I got a free account with Thingspeak (as a student): runs out in November though.
The diagram below is from Dragino’s wiki page. Steps 3 and 4 are the LG01/ XC4394 communicating with an MQTT IoT server/ broker.

Easy bit
Following the Dragino docs tutorial for setting this up is fairly straightforward. FYI, I have a LAN cable from my laptop to the LAN port of the gateway and access the web UI via http://10.131.1.1 The steps include:
- Connecting XC4294/LG01 to your wifi network (or LAN).
- Setting up Arduino IDE for with libs and devices.
- Uploading client/node sketch to Arduino & XC4392 LoRa shield. The demo code sends temp and humidty vales from a DHT11, but you don’t need this component to test (it’ll just send 999 for temp & humidity).
- Uploading bridge-server sketch to XC4394/LG01 (as an Arduino Yun OTA).
- Having the node and the MCU part of the component communicating via LoRa.
- Testing the linux side of the gateway using mosquiito_pub client from bash (via SSH):
mosquitto_pub -h mqtt.thingspeak.com -p 1883 -u <user_id> -P <password> -i <client_id> -t channels/<remote_channel_id>/publish/<write_api_key> -m "field1=34&field2=89&status=MQTTPUBLISH"Trickier bit
Beyond (7) above thing broke and I had to fiddle around under the Linux-hood of the LG01/ XC4394 to get things going. Here is what I surmise is supposed to be happening:
- A script (
/usr/bin/iot-daemon) runs on Linux-side. This checks what IOT server is selected (it reads this from/etc/config/iot-services). Since we set MQTT via the webUIiot-daemonshould startetc/scripts/iot/mqtt_process.sh mqtt_process.shinitially reads mqtt settings frometc/config/mqttand starts a loop polling a polling the directory/var/iot/channels/at 5-second intervals- XC4394/LG01 MCU side recieves a LoRa message. Uses
processto run/usr/bin/store_data <channel_id> <data>on Linux-side which saves data to a text file calledchannel_idat/var/iot/channels/ - Loop in
mqtt_process.shpicks this up, parses it and sends to MQTT broker usingmosquitto_pub.
The problem
As far as I can work out (1) does not happen … mqtt-process.sh is not started.
And if you run the mqtt-process.sh script manually from bash (via SSH > sh mqtt-process.sh ) it is unable to construct the correct tags on the mosquitto_pub command in (4). This seems to be because there are supposed to be some default values for Thingspeak but these are not extant in the config files.
The quick-fix solution
- In the Sensor> MQTT page of webUI, don’t select ‘Thinkspeak’, select ‘General Server’ and fill out as below:

- Replace
etc/scripts/iot/mqtt_process.shwith my hacked version in this gist. To do this you will need to have file transfer access to the LG01/ XC4394. I am using NppFTP in Notepad++.

- Start
mqtt_server.shyourself from the bash. Yep this is not ideal.
What now?
Of course, it would be better/ nicer/ easier to have ‘compliant’ LoRa/LoRaWAN hardware. Or something a little more documented. But I am happy to have something LoRA working.
It’s all good having the receiver and the node sitting a metre apart on my desk. I need to get ~1.25km range from my house to an-disclosed-location in the sea.
Also, as I mentioned, my free account with Thingspeak ends end-of-November 2021 so need an alternative. HiveMQ offers a free cloud solution, or a locally running MQTT broker.